• info@dragon3d.com.vn
  • +84982225662

QUALITY INSPECTION

PROVIDING VALUABLE INSIGHT INTO YOUR PRODUCTS

Dragon3D provides detailed inspection of both CAD and Drawings, providing a full range of easy-to-understand reporting.

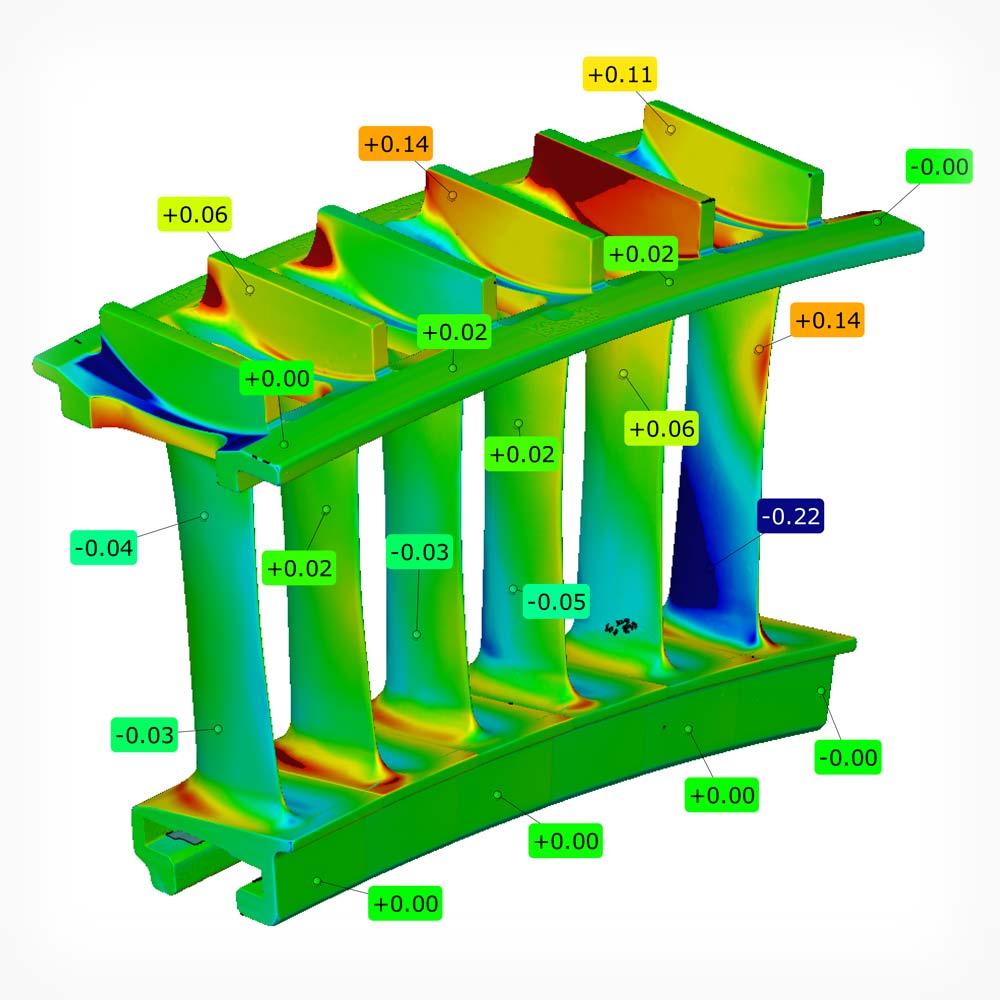
The GOM measurement systems used by our team deliver the full-field scan data and sufficient resolution needed for genuine full-surface inspection, allowing the delivery of complete surface colour-deviation maps, GD&T inspection back to drawing FAI and LAI and trend analysis across multiple-part inspection.

Quality in our results comes from the quality of our methods. Our team at Dragon3D is extremely diligent when it comes to working practices and procedures and we are proud to have achieved a UKAS certification for ISO 9001:2015 for our outstanding Quality Management System. 

QUALITY INSPECTION

More on our quality inspection services

Inspection for reverse engineering

When reverse engineering an existing component or assembly it is critical to understand your starting point. Basing a design on a single example risks that sample being a poor representation of the original design. Where possible, a sample of parts should be measured and inspected to ensure that the resultant nominal part is as close to the original design as possible. For these activities, Physical Digital conducts trend analysis to either identify the part most representative of the given sample or create a ‘Golden Mesh’ which is a combination of the full sample filtered and averaged to best represent the part as originally designed. With a part identified, full geometric inspection is carried out to provide a comprehensive set of dimensions from which a new design-intent model can be created. We use our wealth of experience in design for manufacture and design for assembly to determine the difference between deviation from design through manufacture or use and design intent providing functional models for use in the future.
Inspection for reverse engineering

Manufacturing and quality inspection

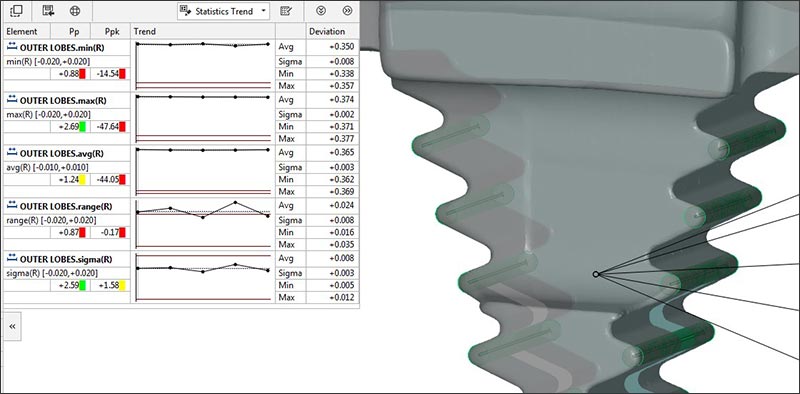
Dragon3D provides a comprehensive quality inspection service utilising the fully traceable inspection software native to our GOM systems. Inspection back to CAD can take advantage of the full-field surface data allowing surface deviation colour maps across the whole surface in addition to GD&T and the point-wise inspection associated with single-point CMMs. While the inspection requirements are still determined by an inspection drawing, our inspection software is PMI capable allowing CAD-driven comprehensive 3D inspection. Batch inspection delivers powerful insights into manufacturing processes. Inbuilt trend analysis allows us to provide process capability statistics (Ppk, Cpk) while retaining the ability to interrogate the 3D data on an individual basis. Using one software house throughout maintains unbroken traceability from capture to analysis. Physical Digital provides this functionality using GOM Inspect, in addition to delivery of more the traditional .pdf and .csv formats that can be integrated into customer-specific quality management systems.

Inspection for investigation

When prototyping or investigating, inspection requirements are not always clear. Unlike traditional point-wise inspection, full-field data capture does not require prior knowledge or prior inspection planning. The data can be captured and subsequently interrogated, with the form driving the inspection. Destructive testing often involves plastic deformation and fracture mechanics that leave shapes requiring high-resolution, full-field measurement to accurately define their geometry.

Simulation verification

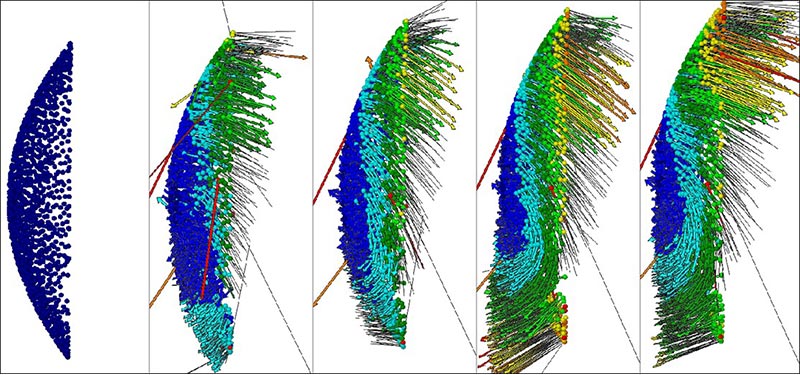
In addition to multiple-part inspection, Dragon3D can provide large-scale deformation analysis. By conducting sequential point-wise inspection the behavior of a part can be interrogated under different loading conditions, the results of which can be used to inform and validate FEA analysis.

Simulation verification

Aerofoil inspection

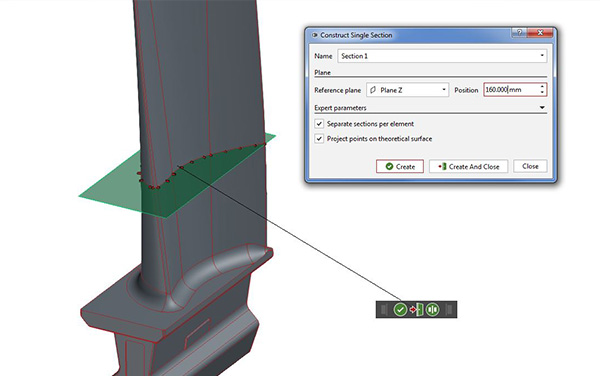
Recognising the power of high resolution, full-field data over freeform surfaces, GOM have a suite of aerofoil inspection tools available within their software which Physical Digital puts to good use allowing us to comprehensively inspect the following: · Profile mean lines · Profile centroid · Profile twist · Flow inlet/exit angles · Chord line (bitangential, axial, max) · Stagger angles · Camber angles · Blade pitch · Throat area/sectional distances Where material allows, our team of skilled engineers integrate CT data to provide analysis of internal cooling passages. Often alloy technology outstrips CT scanners ability to penetrate the surface and we use our extensive design experience to create custom fixtures and cutting paths allowing us to gain visual access to capture and inspect internal geometry with minimal loss of material or impact on shape.

GET IN TOUCH

Contact us now to find out how our 3D optical measurement services can support your project and deliver outstanding results.

  • Call: +84982225662
  • Email: info@dragon3d.com.vn
Messenger
Zalo
Gọi ngay
Liên hệ