• info@dragon3d.com.vn
  • +84982225662

AEROSPACE

EXPERTS IN 3D MEASUREMENT FOR AEROSPACE

Dragon3D is proud to be preferred measurement suppliers to many leading Original Equipment Manufacturers within the aerospace industry. Using industry-leading GOM three-dimensional structured light (3DSL) optical scanning systems, our skilled metrologist and engineering team will accurately capture your precision products, transforming physical objects to digital form.

AEROSPACE

More on our aerospace 3D scanning

Accuracy, precision, stability and traceability

When using 3D scanning as a measurement system, it is important to understand aspects which contribute to a high level of confidence in the delivered results. Physical Digital undertakes project specific and long-term monitoring of these key performance indicators to ensure high measurement stability and provide unrivalled confidence in the results it delivers. These aspects differentiate Physical Digital from all other providers of 3D scanning in the aerospace industry and provide an industrial measurement solution in-line with traditional CMM measurements, with the advantage of full-surface data capture. Precision Precision can be shown in many forms, however the simplest way to understand this is by looking at the spread of results produced when taking the same measurement. Range is the basic form of this and shows the variation across the measured sample. It is also common to use statistics to extrapolate the range given any sample size. Precision should be the starting point of any measurement understanding, without a precise measurement system it is difficult to have confidence in the results produced and the measurement process is technically out of control. Physical Digital can provide supporting studies to any customer specification and typically use AS13003 as a standard when performing these for our aerospace customers. Accuracy Accuracy is the error between the measurement result and a known value, this is the bias of the systems and, providing the measurement is precise, can be easily compensated back to a nominal result if required. Accuracy can be calculated back to a golden part or calibrated artefact and provides a method of validating results against a known reference standard. Physical Digital continuously evaluates accuracy via the VDI/VDE 2634 Standard with artefacts of <1µm uncertainty. Stability The ability to produce the same measurement over any extended period is an important factor when undertaking long-term projects. Physical Digital operates Statistical Process Control (SPC) to monitor and maintain our systems over time and provide confidence to customers that results are stable over our long-term support contracts. Traceability Traceability is the ability to provide an unbroken chain of comparisons from a known standard to the delivered results. 3D scanning systems have historically lacked this; however Physical Digital maintain the highest level of industry calibration and traceability and utilise the GOM photogrammetry systems with traceable artefacts of less than <1µm uncertainty.

3D scanning for aerospace

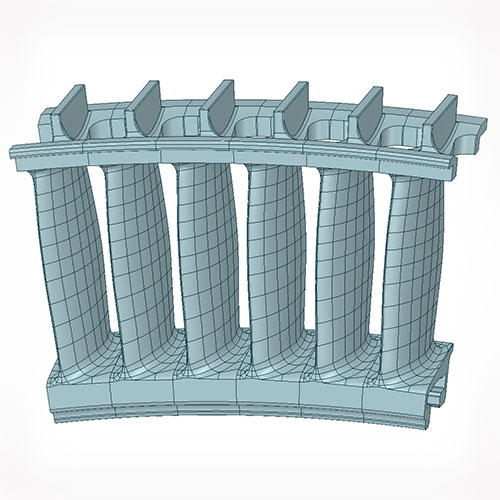
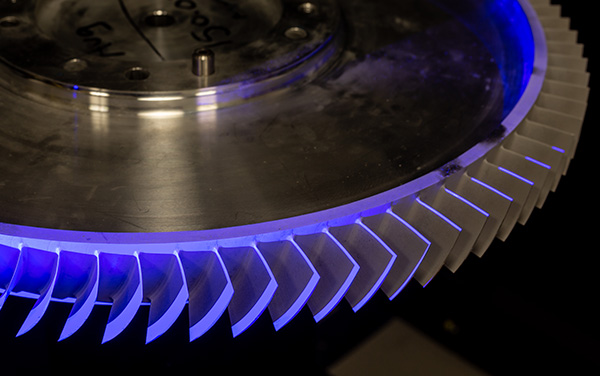
Non-contact measurement solutions are becoming essential to many applications for the aerospace industry. From capturing the geometry of individual turbine blades, large castings to whole airframes, the GOM systems can capture traceable, high-resolution data repeatably and accurately. With small components such as turbine blades, the accuracy, precision and resolution are all key to achieving trustworthy inspection reports. To aid repeatability whilst ensuring a high level of accuracy, our in-house design team can design and manufacture bespoke fixtures to improve stability of the component throughout the measurement process. 3D optical measurement is completed within our environmentally controlled measurement cell, located at our premises in Surrey, to further ensure optimum levels of accuracy and traceability of your component are achieved. Utilising the TRITOP photogrammetry system Physical Digital are able to investigate the mating of large castings or the interfaces between components. This digital assembly can be completed before the parts are mated together, to ensure manufacturing tolerances have been achieved. The capture of full airframes for reverse engineering or aerodynamic inspection is a complex task. Our skilled engineers use the TRITOP photogrammetry system combined with the ATOS optical metrology system. The photogrammetry process accurately calculates reference points placed across the airframe resulting in a reference point cloud. The measurement system then refers to this reference point file to determine its location on the object, which further aids the overall accuracy of the project.

Reverse engineering and design for aerospace

The design team at Physical Digital has vast experience of working with aerospace components, which have been manufactured to a very high level of accuracy. Once the surface form has been captured using our 3D measurement services we can complete reverse engineering to the original design intent to allow re-manufacture of components such as; turbine blades, vanes, nozzles, housings etc. Our in-house design team can produce engineering, manufacturing and inspection drawings to the client requirements.

Quality inspection for aerospace

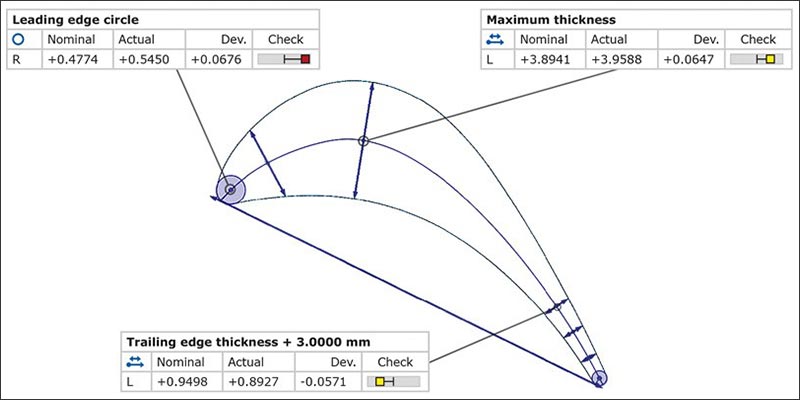
Aerofoil Inspection Recognising the power of high resolution, full-field data over freeform surfaces, GOM has a specific suite of Aerofoil inspection tools available within their software which Physical Digital puts to good use allowing us to comprehensively inspect the following: · Profile mean lines · Profile centroid · Profile twist · Flow inlet/exit angles · Chord line (bitangential, axial, max) · Stagger angles · Camber angles · Blade pitch · Throat area/sectional distances When material allows, Physical Digital integrate CT data to provide analysis of internal cooling passages. Often alloy technology outstrips CT scanners ability to penetrate their surface and we use our extensive design experience to create custom fixtures and cutting paths allowing us to gain visual access to capture and inspect internal geometry with minimal loss of material or impact on shape.

Quality inspection for aerospace

GET IN TOUCH

Contact us now to find out how our 3D optical measurement services can support your project and deliver outstanding results.

  • Call: +84982225662
  • Email: info@dragon3d.com.vn
Messenger
Zalo
Gọi ngay
Liên hệ